
The shift to herb farming tech
Herb farming is changing. While hand-trowels and watering cans are still standard, modern production relies on tech to keep margins healthy. We use these tools to cut down on labor and stop wasting expensive inputs.
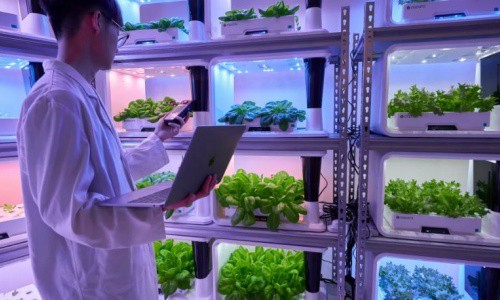
It’s not about replacing traditional knowledge, but augmenting it. Precision irrigation systems, automated harvesting tools, and data-driven insights are becoming increasingly common. This isn’t just for large-scale commercial operations either—even smaller herb businesses are finding ways to integrate affordable tech to gain an edge. For many starting out, a full overhaul isn’t realistic, and that’s okay. We’ll cover tools for every scale.
Why is this technological leap so important? Simple: ROI. Herb farming can have relatively thin margins. The cost of land, labor, and organic certification (if you go that route) adds up quickly. Being able to optimize every stage of the growing process – from seed to sale – is essential for maintaining profitability. Every little bit counts when you're trying to build a sustainable business.
The demand for herbal products is significant and continues to grow, as people increasingly seek natural alternatives for health and wellness. According to a report from the American Herbal Products Association, the herbal supplement market alone reached $9.64 billion in 2022. This growth presents opportunities, but also increased competition. Investing in the right equipment, both traditional and technological, is what will set you apart.
Harvesting and processing
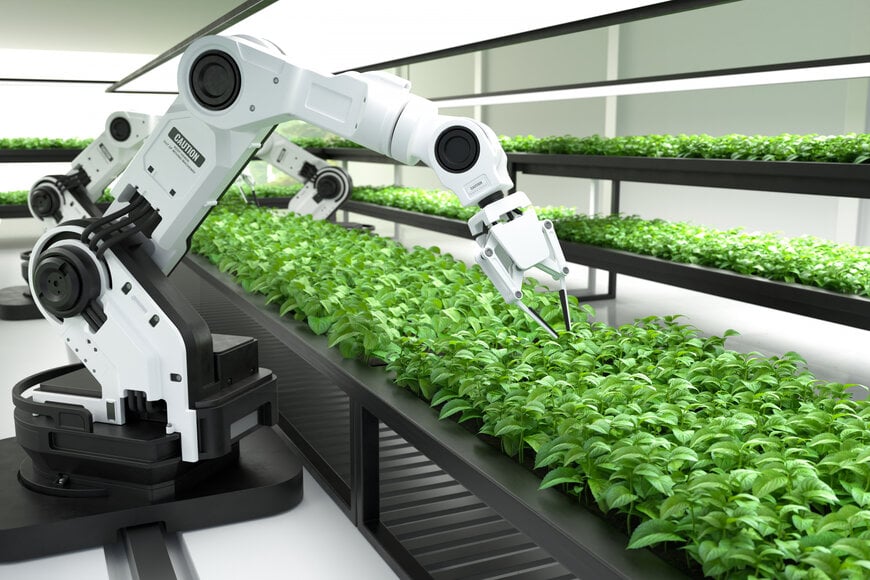
Harvesting herbs at the peak of their flavor and potency requires the right tools. For small-scale operations, sharp knives and scissors are sufficient. For larger operations, mechanical harvesters can significantly reduce labor costs, but they require a substantial investment. These machines can range from $2,000 for a simple hand-pushed harvester to $20,000+ for a tractor-mounted model.
Once harvested, proper drying is essential to preserve the herbs’ quality and flavor. Dehydrators are a convenient option for small batches, costing around $100-$300. Hanging racks are a more traditional method and are very affordable. Commercial drying rooms offer the most control over temperature and humidity, but they are also the most expensive option. You’ll need to consider airflow and humidity control within these rooms.
Proper storage is crucial to maintain quality. Herbs should be stored in airtight containers in a cool, dark, and dry place. If you’re considering essential oil extraction, be prepared for a significant investment. Distillation equipment can cost anywhere from $5,000 to $50,000+, depending on the scale and complexity.
Packaging and post-harvest
Getting your herbs ready for market requires careful post-harvest handling. Cleaning equipment, such as a wash tank and conveyor belt, is essential for removing dirt and debris. Sorting tables allow you to inspect the herbs for quality and remove any damaged or diseased plants. These can be simple DIY setups or more sophisticated commercial models.
Packaging is crucial for preserving freshness and attracting customers. Jars, bags, and pouches are all common options. Labeling requirements vary depending on your location and the type of product you’re selling. You’ll need equipment to create compliant labels, including a printer and label design software. The cost of packaging equipment can range from a few hundred dollars for a basic label printer to several thousand dollars for a fully automated packaging machine.
Consider offering value-added products, such as dried herb mixes, teas, or infused oils. This can increase your profit margins and differentiate your business. Equipment for creating these products – such as grinders, mixers, and bottling machines – will add to your initial investment, but can broaden your market reach. Remember to research and comply with all relevant food safety regulations.
Irrigation System Comparison
| System Type | Initial Investment | Water Usage | Labor Needs | Scalability |
|---|---|---|---|---|
| Drip Irrigation | Lower | Very Efficient | Moderate | Good for Expansion |
| Micro-Sprinkler | Medium | Efficient | Moderate | Suitable for Dense Plantings |
| Automated/Smart Irrigation | Higher | Highly Efficient | Lower | Best for Large Operations |
| Soaker Hoses | Low | Moderate | Moderate | Better for Small, Focused Areas |
| Manual Watering (Handheld) | Very Low | Less Efficient | High | Only Practical for Very Small Gardens |
| Subsurface Drip Irrigation | Medium-High | Extremely Efficient | Low | Good for minimizing weed growth |
Qualitative comparison based on the article research brief. Confirm current product details in the official docs before making implementation choices.


No comments yet. Be the first to share your thoughts!